Linksys Velop is among the most preferred mesh-type wifi router series you can find in the market. If you have recently upgraded to the Linksys Velop routers, learning about the Velop login steps becomes essential. This page will walk you through the steps to access the Linksys Velop login wizard so you can begin configuring the network settings easily.
Linksys Velop Whole Home Mesh WiFi Login Details
The Linksys Velop login process begins with connecting to the device network. Once logged in, you can access the setup wizard and proceed with configuring the network settings easily. However, before you start, you’ll need the Linksys Velop Whole Home Mesh WiFi login credentials. Here are some details you can refer to:
Admin username: admin
Password: password
Default web address: https://myrouter.local
IP address: http://192.168.1.1
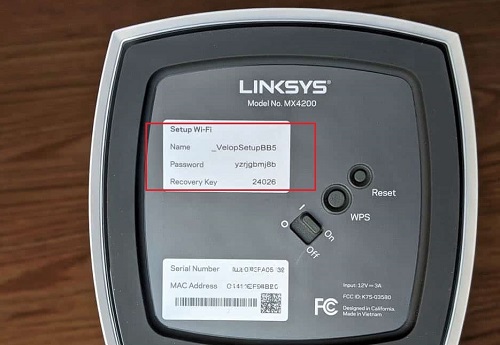
These details along with those related to your Velop’s network bands can be found on the product label on the rear or bottom of your router. If not, you can refer to the product user manual to locate the same.
Beginning with the Linksys Velop Login
To proceed with the Linksys velop login process, you’ll need to connect your computer or smartphone to the router’s local network. You can do that in two ways- Wired or Wireless.
Wired Connection
- Use an ethernet cable to connect your computer to the router. Plug one end of the cable into one of the LAN ports on your router and the other into the ethernet port on your computer.
- The respective LAN LED on the router will now glow and you’ll see the network status on the computer turn to connected.
Wireless Connection
The Wireless connection utilizes the WiFi feature on your devices to pair them.
- To start, turn on the WiFi and start accessing the WiFi settings on your computer. Also, make sure that the wireless on your router is enabled.
- Once the WiFi Settings page appears, click on the SSID of the network and click on the Connect button.
- Your device will now get connected to Linksys Velop’s network.
- Once connected, you’ll see the WLAN LED on your router glow up, and the network status on the wireless device change to Connected.
Accessing Linksys Velop Default Router Login page
Once you have connected your smartphone/computer/ wireless device to the WiFi network at your home, you can access a web browser and proceed with the velop login process. Here are some steps you can follow:
- Launch a web browser on your connected device. You can use Apple Safari, Mozilla Firefox, Google Chrome, Internet Explorer, Microsoft Edge, and more.
- In the address bar, type the default web address http://myrouter.local and press Enter. If the web address fails to pull up the login page, you can use the IP address 192.168.1.1 to reach the same.
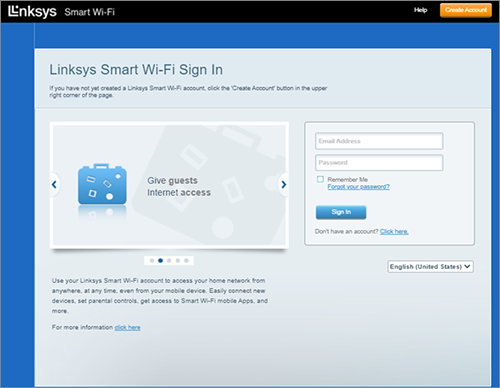
- Once there, you will see the username and password fields. Type in the Linksys Velop admin login credentials and click on the Login button.
- You will now reach the Velop router setup wizard online.
The Linksys Velop login process is now complete.
Change your Linksys Velop login password
In the event that you are looking to change the Velop login password, you can access the setup wizard online and proceed with the simple steps:
- Login to your Velop setup wizard using the Linksys Velop App.
- Tap on the Velop Administration and then select the Change Velop Password and Hint option.
- Replace the existing values with the new values and tap on the Save button.
Once you have changed the details, you will receive an email from Linksys mentioning the password change.
Linksys Velop Firmware Update
To ensure your Linksys Velop keeps running as intended, you will need to keep the firmware updated at all times. Updating the firmware to the latest version helps with fixing device bugs and adds different features to the device. Here are some steps you can follow to update the Linksys Velop firmware:
- Login to the Linksys Velop Whole Home Mesh WiFi setup wizard using the default web address.
- Once you are in the Dashboard, select the Menu icon and go to the Network Administration section.
- Tap on the name of your Parent Node to locate its IP address.
- You can now download the latest firmware file to your computer. Extract the main file from the compressed folder.
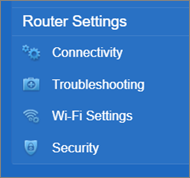
- Now, head back to the Velop setup wizard and click on the Connectivity option you see under the Router Settings wizard.
- From under the Basic tab, click on the Choose File option.
- Select the firmware file you have downloaded and then click on the Start button.
- Click on the Yes button again and wait for the update process to complete.
- The screen will show you the status of the update.
- Allow the process to complete and then click OK when the Router Reboot window appears. Finally, click on the OK button again to complete the update process.
The final word
You can also use the Linksys smartphone App to access the login page and then proceed with the setup process. You can download and install the Velop app from the app store or the play store and proceed with the network setup easily.
Once logged in, you can easily proceed with the in-app instructions for the network and device setup process. If you face issues completing the setup process or accessing the Linksys Velop Login page, you can read through the Linksys troubleshooting steps here. Or, you can always reach out to the team at our end.